Shooting your own photos is a great way to create authentic content for your website while showing off your work. You don’t always need a professional photographer or special equipment to take great photos, either. Knowing some photography basics can help you take high quality photos with a basic digital camera or even your phone. This is part one of a series we’ll be doing on how to shoot and edit awesome photos for your website.
Note: All photos for these posts were taken with an iPhone. More on that coming soon.
Subject Matter
When taking photos for your business, it’s key for the subject of your photos to be relevant to what you do. We’ve collected some subject ideas to help you get a start.
Show off Your Facility
Showcasing your business facility inside and out is a great start. Storefronts and signage are a great way to make your brand be the focal point in your photos. When taking photos of your place of business, be sure to eliminate distractions like cars in the parking lot and clutter on desks and tables. And don’t just take photos of the structures; take photos of your business in action. Think about the equipment and technologies that help you’re business run and use that as your subject matter.

Employees
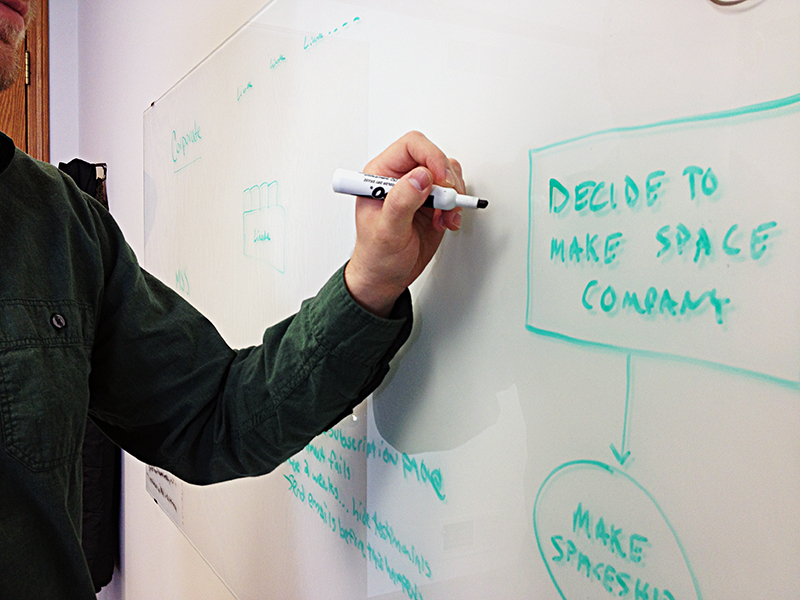
Using photos of your employees is a great way to add a face to your business and make your company more approachable. You don’t need the awkward first-day-on-the-job mug shot, either. Take photos of employees doing what they do best or showcasing their work.

Product or Service in Use
Show off your work by featuring your product or service in action.
Composition
Understanding the best way to arrange the subject matter in your photos will greatly increase the effectiveness of your images. When it comes to composition of your business photos, there are a couple good guidelines to follow.
Rule of Thirds
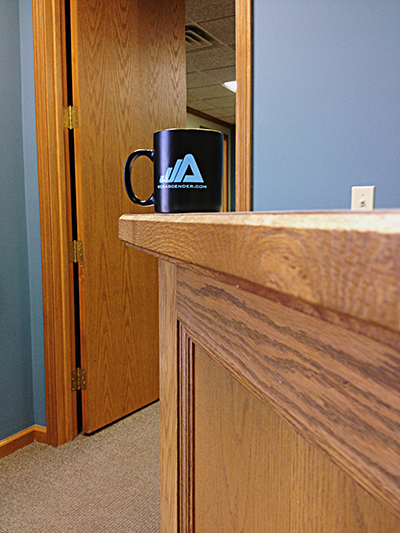
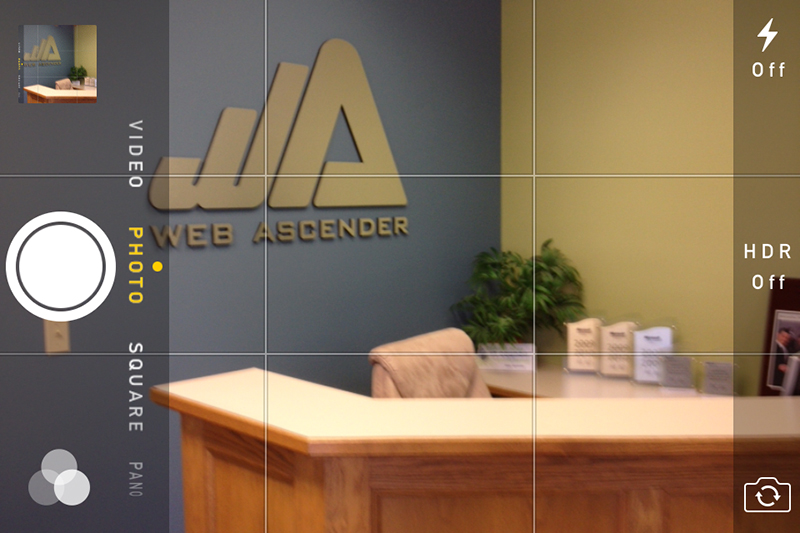
The rule of thirds means breaking your image into three sections vertically and horizontally and setting your subject on one of those lines. Basically, a photo with the subject square in the center can feel static and boring but moving the subject out of the middle can help create motion and energy. Many phone camera apps have a grid that is already set up with these lines so use it to your advantage.

Leading Lines
Leading lines help create a more dynamic photo and allow the viewers eye to be led through the frame to a focal point. Lines are everywhere so learning how to use them to your advantage will help you create effective imagery.
Shooting Straight Lines In Smaller Spaces
When faced with smaller interiors, sometimes shooting straight on will give you the best photo rather than a shot taken at a dynamic angle. If you’re using a phone, use your grid to line up door and window frames parallel to the lines of the grid.
To learn more about composition, check out this article: http://www.digital-photo-secrets.com/tip/3372/18-composition-rules-for-photos-that-shine/
Lighting
Lighting might be one of the most important elements in photography because without it, we wouldn’t have photos. Shooting photos at your place of business presents it’s own challenges but we’ve got some tips to help you make the best of your lighting.
Natural Lighting
When in doubt, shoot photos of your business using natural lighting from windows. Avoid direct sunlight streaming in a room but do shoot on a bright, sunny day inside. If there is enough natural light, you can even turn off other light sources.
You can even use natural light to shoot product images placed on a table next to a window.

Not every workspace has a source of natural lighting but there are ways to compensate for shooting in a facility with only fluorescent lighting. Many digital cameras have a setting you can use specifically in fluorescent light that will help balance the colors. There are even apps for phones that can help you sync your shutter speed with the flicker of a fluorescent light. Check out this post for more information on using the manual settings of your digital camera in fluorescent lighting: http://www.usefulphototips.com/2012/07/18/photography-under-florescent/
Indirect Lighting
If there isn’t enough light, you can always add additional light sources. The key is to use indirect light. Shining a light directly onto an object you’re shooting can create harsh shadows. Using indirect lighting will create a softer, natural look. There are all kinds of accessories you can purchase to create indirect light, and if you take a lot of product photos it might be worth investing in a softbox, but there are ways to create soft light without any fancy equipment.
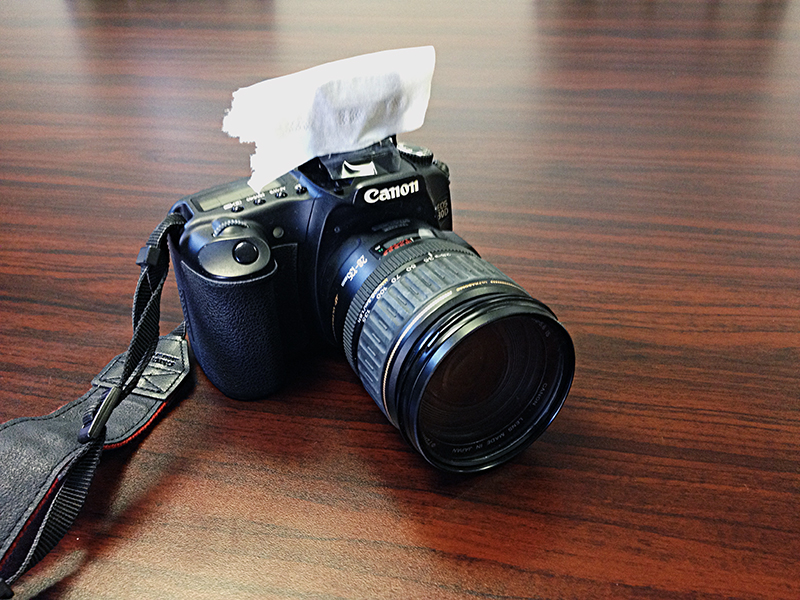
One way to create indirect lighting is to diffuse it. If you’re using a window as your light source, hang a light curtain to create a soft light. If you’re using flash, cover your flash by taping a paper towel over it to make the lighting soft.
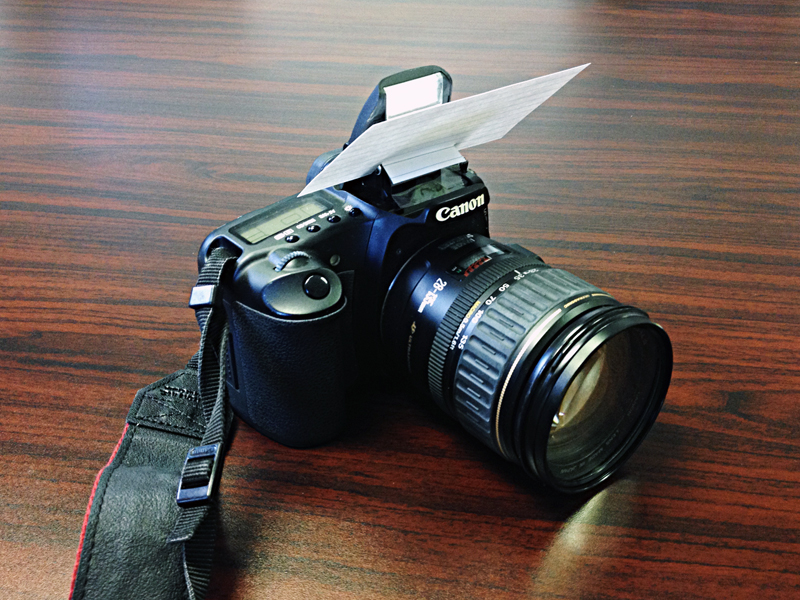
Another way to create soft lighting is to reflect it using mirrors or reflectors. You can even angle your flash to bounce off a wall onto your subject to get indirect sunlight. If you can’t turn the angle of your flash, a notecard taped to the flash angled up works great, too.
Flash or No Flash
Although natural lighting is always preferred, there are times when it’s appropriate to use flash. When shooting indoors where no direct light is available, flash might be the best way to get additional lighting. Just be sure to diffuse it by taping a paper towel over it or angling the flash to bounce of the wall. Experiment with different angles to see what results look the most natural.
Conclusion
You don’t need to spend a lot of money on special equipment to take great photos for your business. Understanding simple photography basics can help you create collateral-worthy photos. We hope we’ve inspired you to experiment with taking your own photos for your business.
Have your own tips and tricks for taking great photos? Tell us about them below!