Creating design elements in photoshop is a great way to add unique buttons and headers to your web design projects. In this tutorial, we’re going to be making a simple, easy ribbon banner in photoshop. This tutorial is perfect for beginners, but assumes you know the photoshop basics including opening a document, creating layers and duplicating layers.
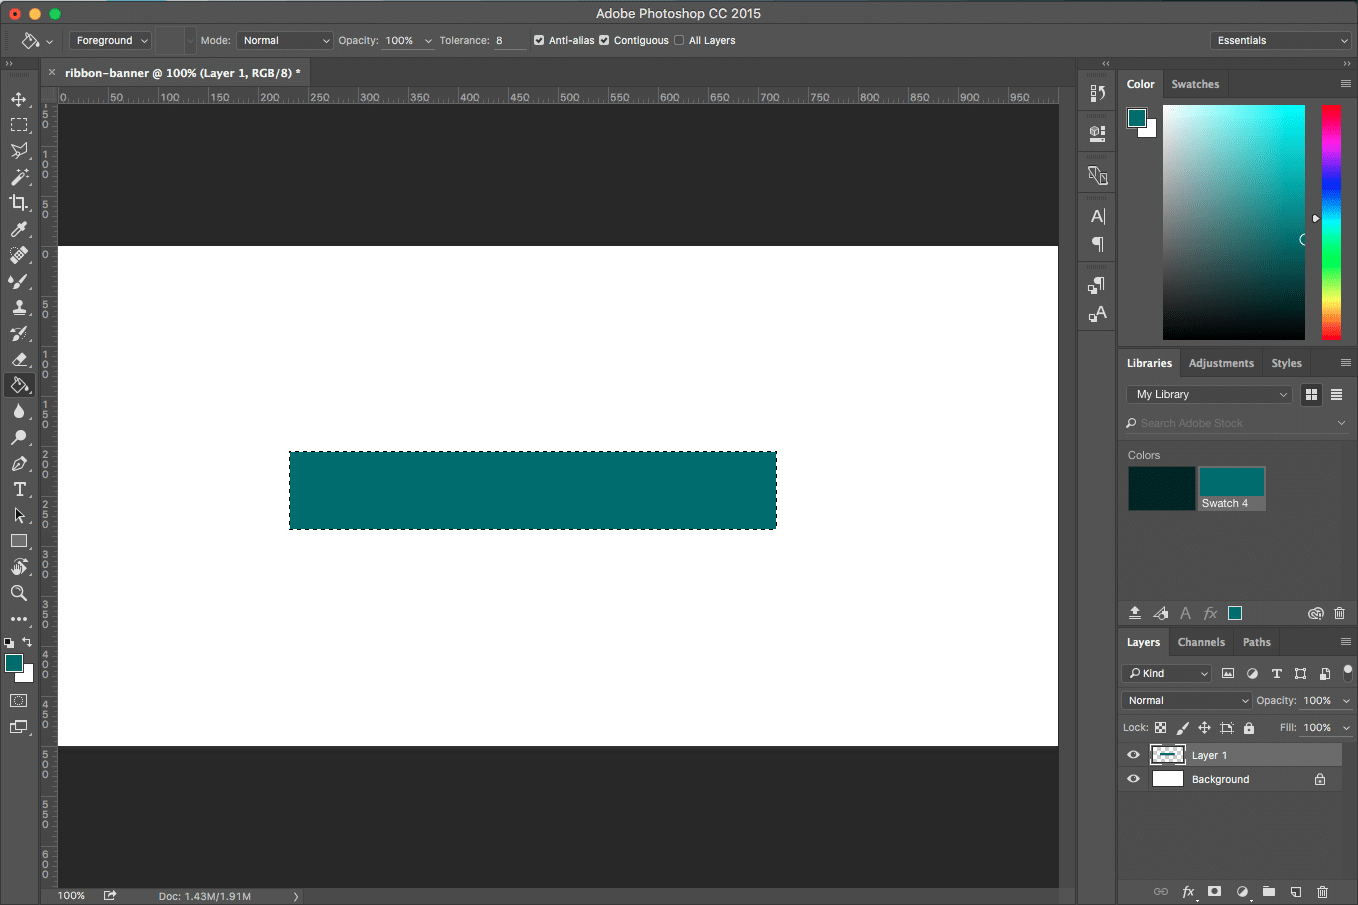
Step 1: Create the middle band of the ribbon banner
In a new layer, create a rectangle using the Rectangular Marquee tool (not the Rectangle tool). Use the Paint Bucket tool to fill in the rectangle with the color of your choice.
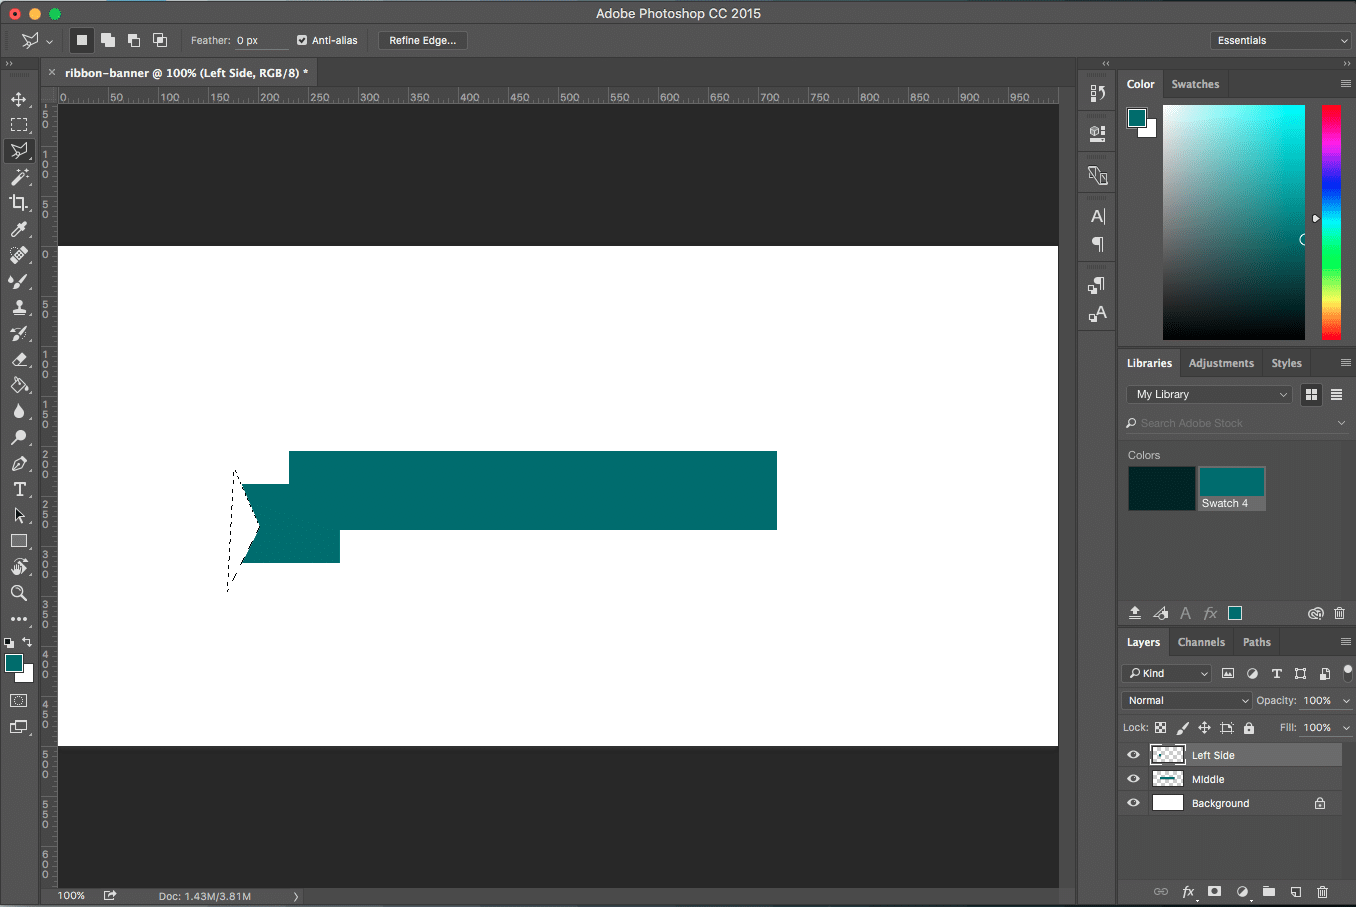
Step 2: Create the ends of the ribbon banner
Make a smaller rectangle which is the same height as the middle band. You can either create a new layer and use the Rectangular Marquee tool again, or duplicate the middle band layer and change the size. Move this smaller rectangle down and to the side.

Use the Polygonal Lasso tool to draw a triangle on top of your new, smaller square. Hit backspace or delete to remove the triangular area. (Tip: cmd+D/ctrl+D exits the lasso tool.)
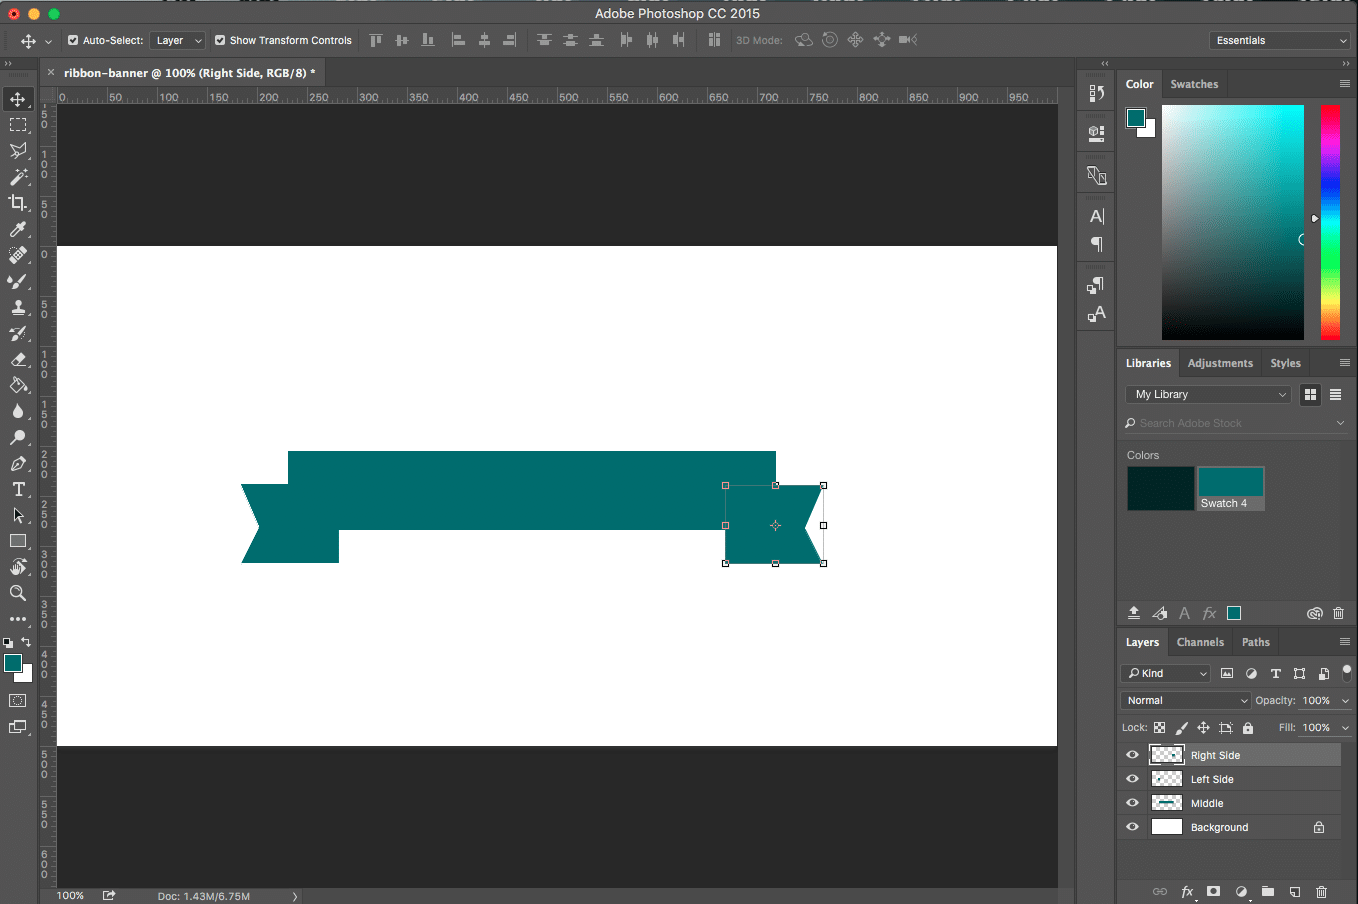
Duplicate the layer and flip horizontally (Edit > Transform > Flip Horizontal). Move the flipped layer to the other side of the ribbon and place the two end layers underneath the middle band layer.
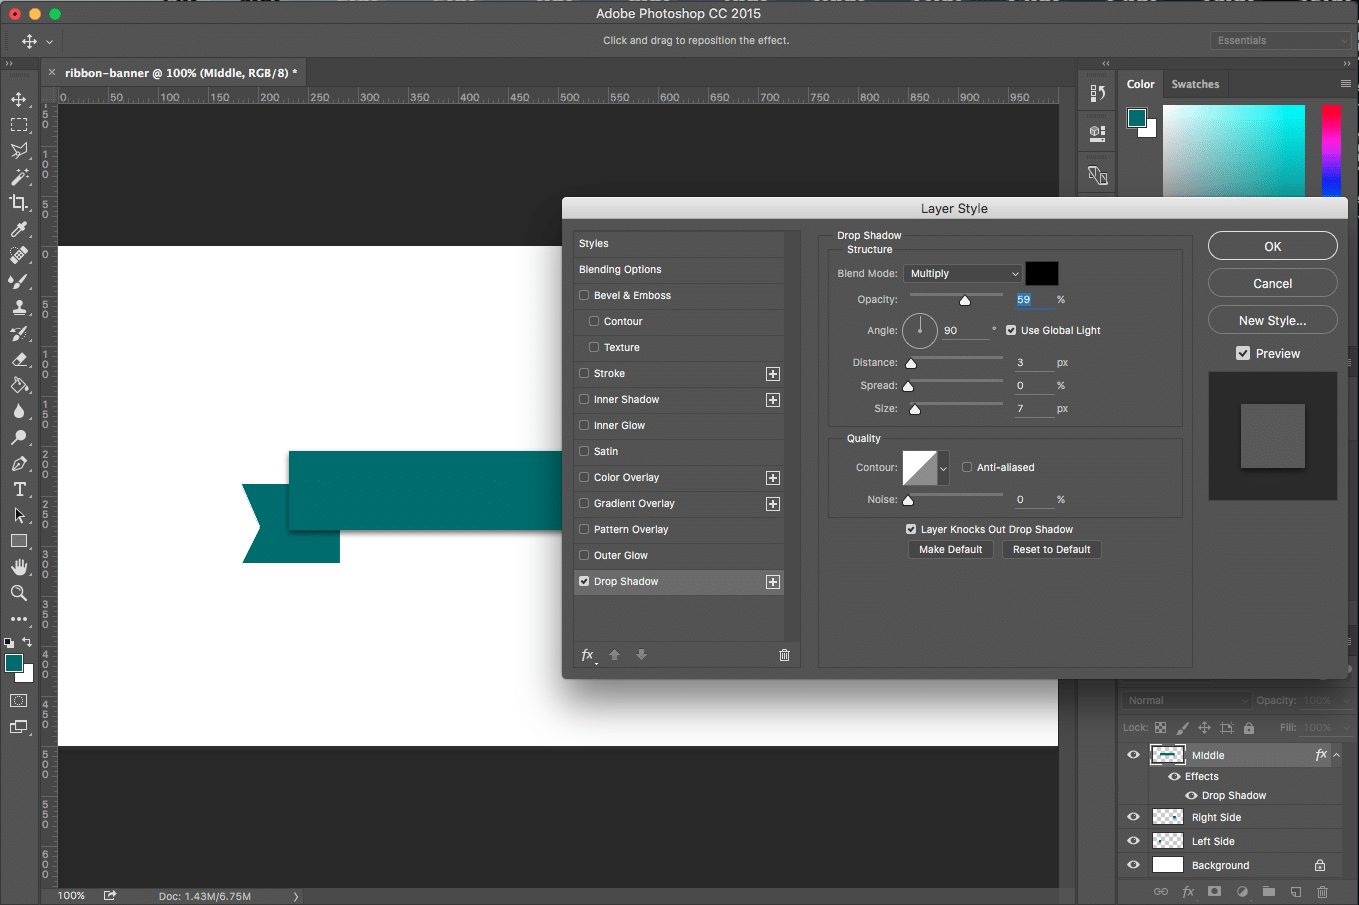
Next we’re going to create the drop shadows, although you could do this at any point once you have the middle and side ribbon pieces made. On the middle piece, create a drop shadow. Copy the layer styles to the two ends of the ribbon.
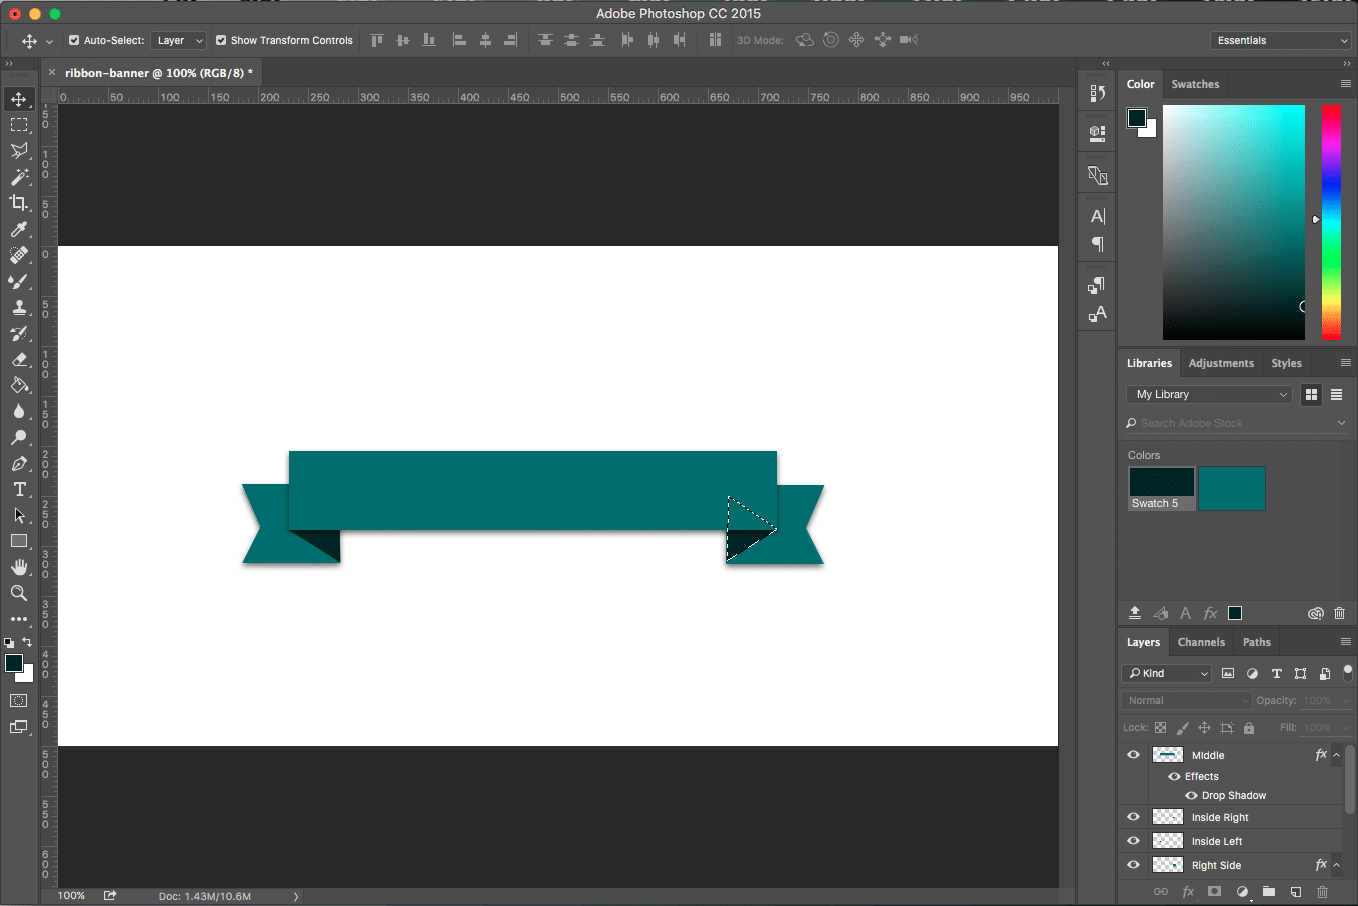
Step 3: Create the insides of the ribbon banner
In a new layer, use the Polygonal Lasso tool to draw a triangle. Fill in the triangle with a darker color using the Paint Bucket. Duplicate the layer and move to other side of the ribbon, adjusting layers as necessary.

BONUS: Make the ribbon banner curvy
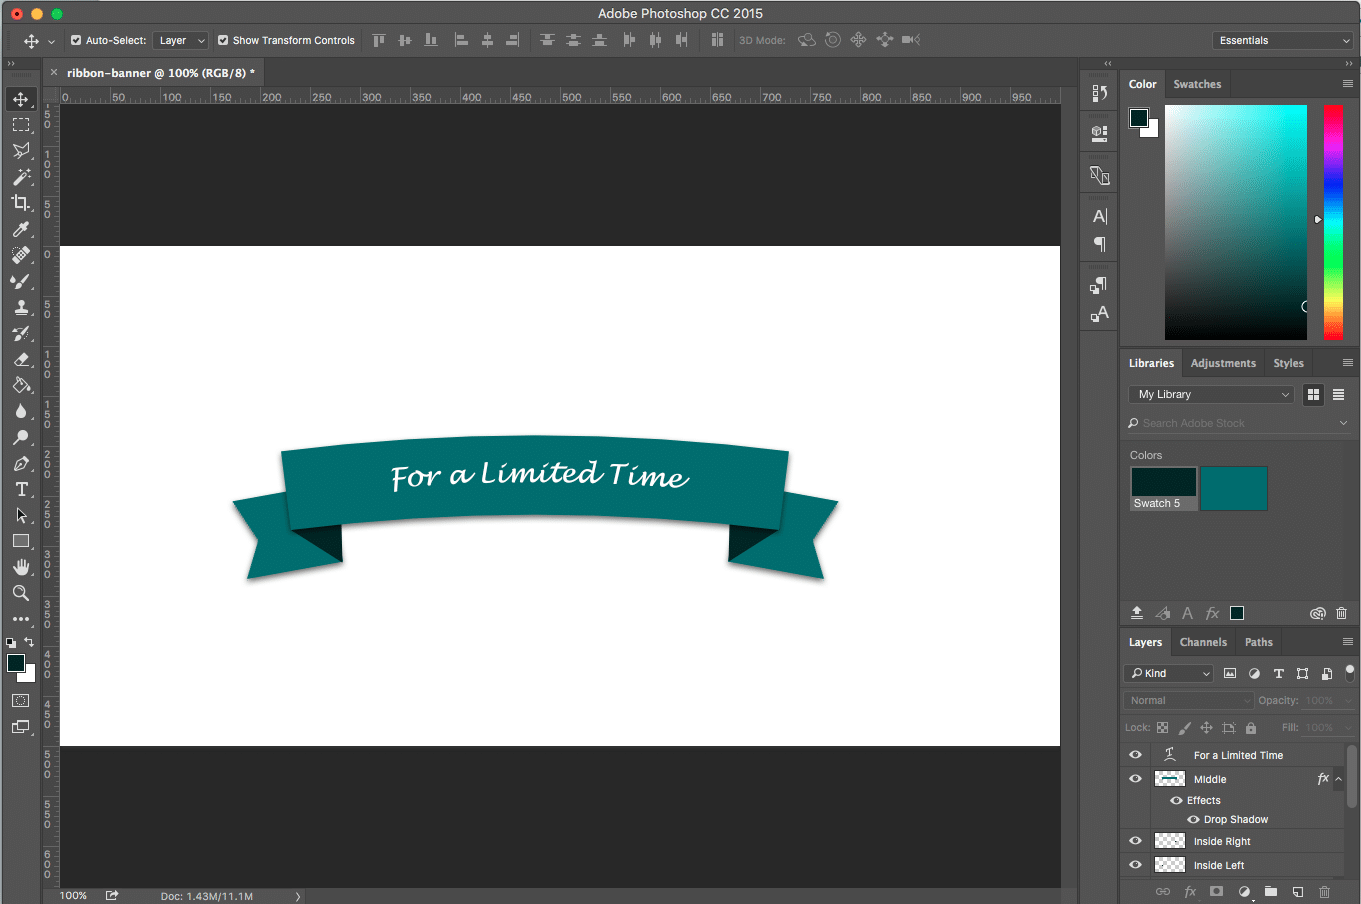
You could call it quits here, add some text to your ribbon, and be done. Or, you could make your ribbon a bit curvy. Creating a curve to the ribbon is a great way to create enhance headers for your web project.
Select the middle piece and go to Edit > Transform > Warp. Set the band value to the desired amount- somewhere around 5-10 is probably good. Rotate the end pieces to match the angle, add some text if you’d like, and you’re done!


This is just one of many options when creating design elements in photoshop for your web project. With flat UI design still prominent as a popular and sleek trend among web designers, using photoshop to build interesting elements will help give your design a fresh look. What other design elements would you like to learn to create in photoshop? Let us know in the comments!