During the development process, it is important to run your web application’s test suite often to avoid any unforeseen issues and to make sure that everything is running smoothly. However, it can be hard to always remember to run the tests as you go, and not to mention, as your test suite gets larger, it takes longer and longer to run. This is where a continuous integration server becomes useful. A CI server can automatically build your application and run tests when you make changes, alerting you to any errors or test failures.
In this tutorial, I’ll set up Jenkins—a popular open source CI server—on a fresh Ubuntu 13.10 install. I’ll then configure it to run a Ruby on Rails project’s Rspec specs when a change is pushed to GitHub.
Install Jenkins and a Ruby environment
- Install Jenkins with apt-get. After this, Jenkins should be up and running at http://localhost:8080
wget -q -O - http://pkg.jenkins-ci.org/debian/jenkins-ci.org.key | sudo apt-key add - sudo sh -c 'echo deb http://pkg.jenkins-ci.org/debian binary/ > /etc/apt/sources.list.d/jenkins.list' sudo apt-get update sudo apt-get install jenkins - OPTIONAL: By default, Jenkins runs on port 8080. If you’d like to make it available on port 80, you can set up a proxy with Nginx or Apache. See the instructions on Jenkins’ wiki for details.
- Install Git, if you haven’t already.
sudo apt-get install git - Before installing Ruby, you’ll want to make sure you have a sane build environment. The following list of packages comes from the ruby-build wiki:
sudo apt-get install autoconf bison build-essential libssl-dev libyaml-dev libreadline6 libreadline6-dev zlib1g zlib1g-dev - Next log in as the jenkins user (created during the apt-get install) and set up Git and Rbenv.
sudo su - jenkins - Create a .gitconfig in the home directory (/var/lib/jenkins)
[user] name = Jenkins email = jenkins@localhost - Install rbenv and ruby-build. I’ll use these to install and manage Ruby versions.
git clone https://github.com/sstephenson/rbenv.git ~/.rbenv echo 'export PATH="$HOME/.rbenv/bin:$PATH"' >> ~/.bashrc echo 'eval "$(rbenv init -)"' >> ~/.bashrc exec $SHELL git clone https://github.com/sstephenson/ruby-build.git ~/.rbenv/plugins/ruby-build - Install Ruby.
rbenv install 2.1.1 # Or whichever your project will use - Install any dependencies specific to your application (e.g., databases, task queues, system tools).
- OPTIONAL: If you plan to access repositories that require authentication (e.g., private GitHub repos), you may want to create a public-private key pair for use with SSH.
ssh-keygen
Configure Jenkins
That’s it for the command line. Next, I’ll use the Jenkins web interface to install plugins, configure security and add users.
- Open your web browser to http://localhost:8080. (If you’re running Jenkins remotely, you should be able to use the server’s domain or IP address.)
- Install Plugins. From the root page, click “Manage Jenkins” then “Manage Plugins”. From the “Available” tab, check the following plugins:
- Git
- GitHub
- rbenv
- Rake
- Next, select “Download now and install after restart”
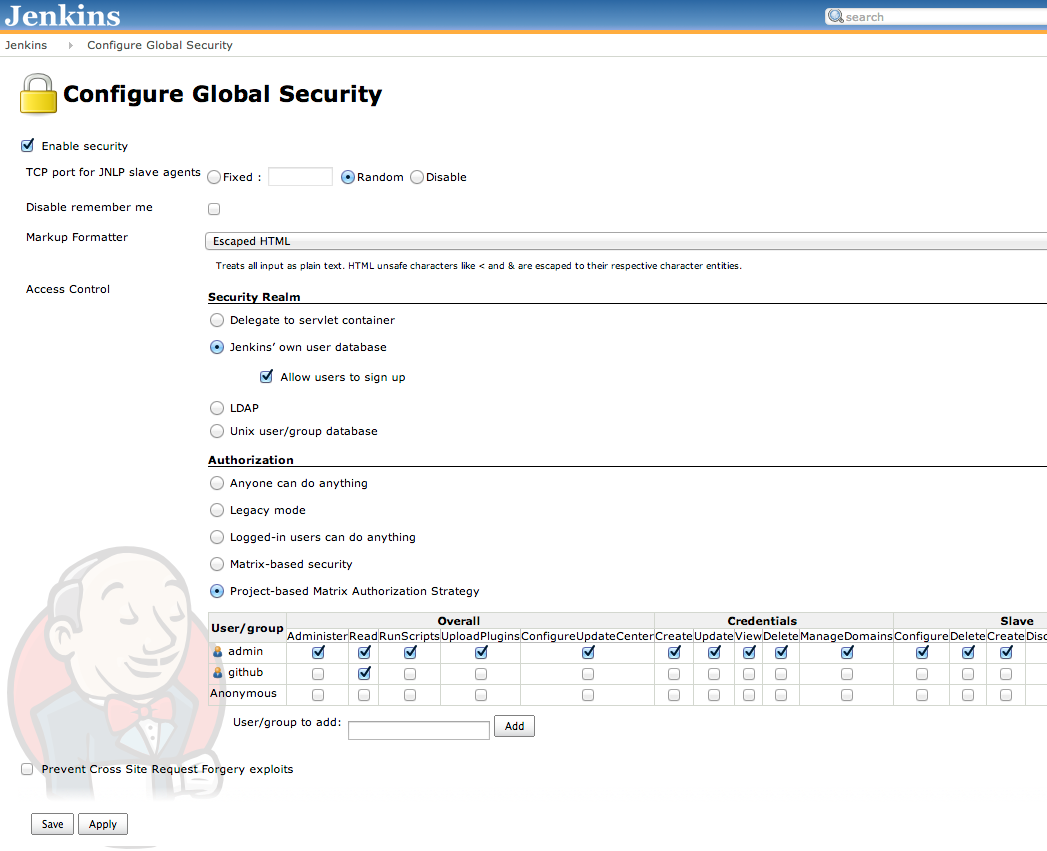
- Configure Global Security. Navigate back to “Manage Jenkins” and select “Configure Global Security”. On this screen, check “Enable Security”, then “Jenkins’ own user database” under “Security Realm”. After that, select “Project-based Matrix Authorization Strategy” under “Authorization”.
- From there, add “admin” and “github” users, checking all permissions for admin and only “Read” for github. Confirm your settings with the screenshot below and save the changes.

- Saving the security configuration will log you out of Jenkins. We’ve only created permissions at this point, so create the “admin” user account by clicking “Create an account”. Create the “github” by navigating to “Manage Users” under “Manager Jenkins”.
Configure your project
Next, I’ll configure our Rails project.
- From the home page, click on “New Item”, then select “Build a free-style software project” and click “OK”.
- Fill in the “Project Name” and “GitHub project” fields.
- Under “Source Code Management”, select “Git” and fill in the repo url. (If you need to authenticate with SSH, configure that here.)
- Check the “rbenv build wrapper” box.
- Add the
ci_reportergem to your project’s Gemfile and follow the instructions in the gem’s README to install. This is used to generate JUnit-style XML reports that can be read by Jenkins from the Rspec results. - Under “Add build step”, select “Execute shell”. A typical Rails app might look like this:
cp config/database.yml.example config/database.yml
bundle install
rake db:create
rake db:schema:load
rake db:test:prepare
rake ci:setup:rspec spec RAILS_ENV=test
Make sure the database is configured properly. If you need a special database.yml, you can store this in Jenkins’ home directory.
- OPTIONAL: To make sure you know when a build fails, set up email notifications (under “Add post-build action”). Configure SMTP on the “Configure System” page, found under “Manage Jenkins”. See the Jenkins wiki for an easy Gmail setup: https://wiki.jenkins-ci.org/display/JENKINS/GMail.
- Try out your build by clicking “Build Now”.
GitHub Integration
Finally, I’ll set up the GitHub integration, so that a push triggers a new build in Jenkins.
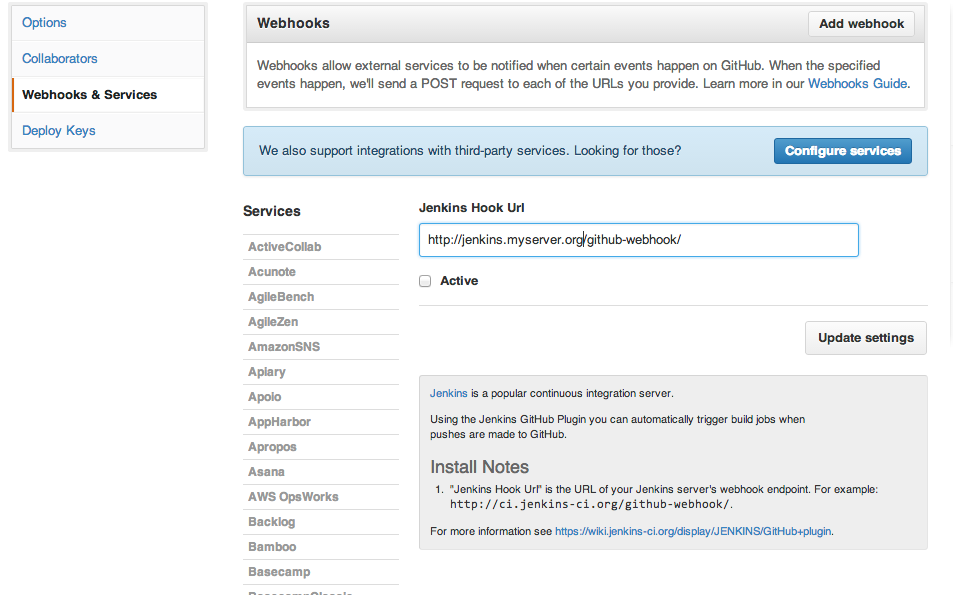
- Navigate to “Webhooks & Services” under “Settings” on the GitHub repository page. You’ll need to be a repo admin to do this.

- Click “Configure services” and select the “Jenkins (GitHub plugin)” option.
- Enter the address to your Jenkins server followed by
/github-webhook/, check “Active” and update your settings. - That’s it. Try it out by pushing a commit to GitHub and verifying that a new build is triggered in Jenkins.