
In this post we will look at how to create a free provisioning profile that will allow us to deploy an Appcelerator Titanium App to our connected iOS device.
This post assumes that your titanium and iOS sdks are set up and working correctly and that you have the titanium command line interface installed. You will also need Xcode 7, the process described here will not work with earlier versions of Xcode. The following links outline the set up process for titanium if you are just getting started.
Setting up Appcelerator Studio
Titanium Command Line Interface Reference
How it works
Xcode 7 allows us to create a free temporary provisioning profile that will allow us to deploy an app to our iOS device. After creating this provisioning profile in Xcode we will then use it to deploy via Titanium. We will make the name of our throwaway Xcode app and the name of our real titanium app the same so that we can use the same provisioning profile with both.
Apple ID and signing identity
If you do not already have one, you will need to set up your development certificate/identity in Xcode. To do this you will first need an Apple ID. You should already have an Apple ID which is connected to your iOS Device. You can go to https://appleid.apple.com to create or locate your Apple ID if necessary.
Next open Xcode and click Xcode > Preferences. Then click the Accounts section. You should see a list of your Apple IDs. You can click the “+” button in the lower left corner to add your Apple ID.
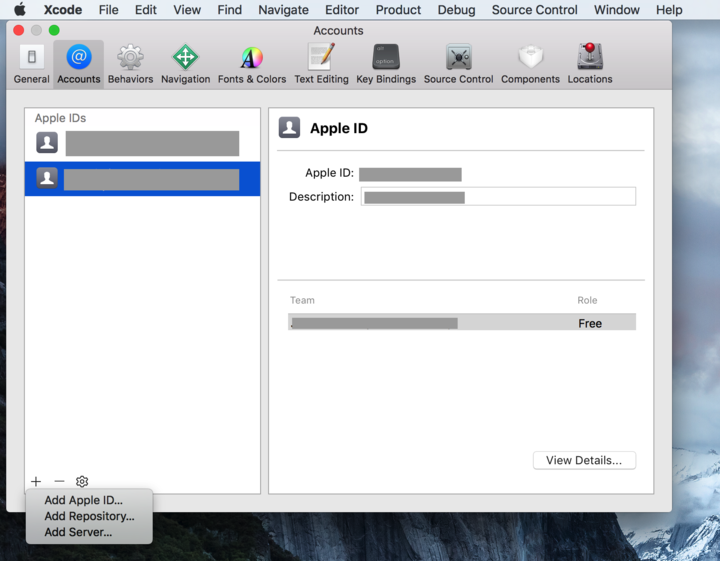
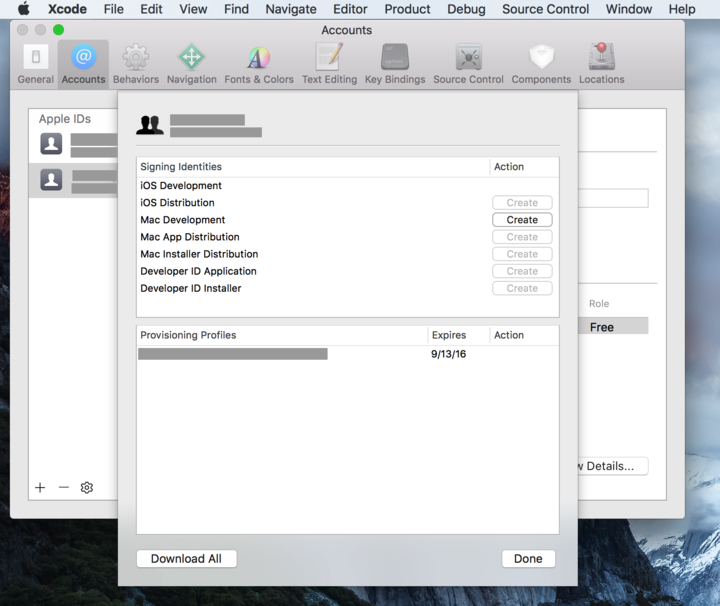
Once you have added your Apple ID click the View Details button and then click “Create” next to iOS Development. Note that you will not yet have any provisioning profiles listed for your account.
Create the provisioning profile
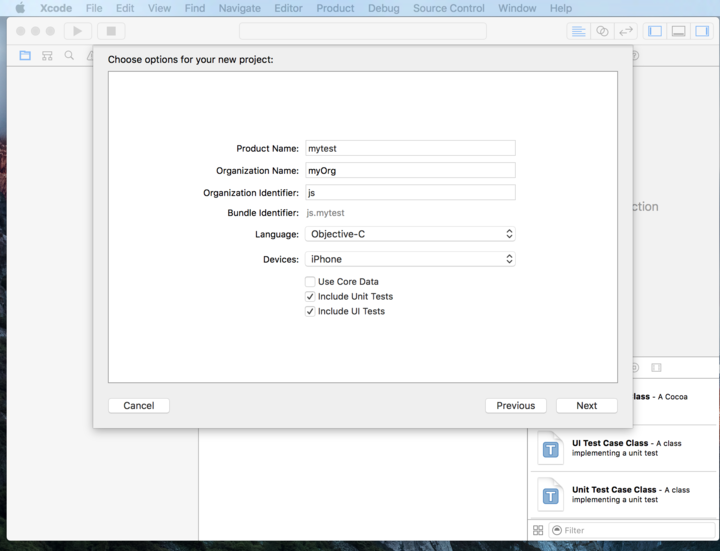
First get the id of your titanium app. You can find this in the tiapp.xml file. For my titanium app, the id is js.mytest. Next connect the iOS device that you will be using to your computer. Now we’ll create a throwaway project in Xcode. Click File > New > Project to create a new project. You can just choose the simple “Single View Application” when prompted. Change the Product Name and Organization Identifier so that the Bundle Identifier matches the id of your titanium app. The Bundle Identifier must match our titanium app id if we want to be able to use our provisioning profile with our titanium app.
Once on the project screen, at the top choose your iOS device from the drop down and click the play button to run your app on this device. Your build will fail and a prompt will display. Click the ‘Fix Issue’ button to have Xcode generate your provisioning profile. Select your Apple account from the Development team drop down.
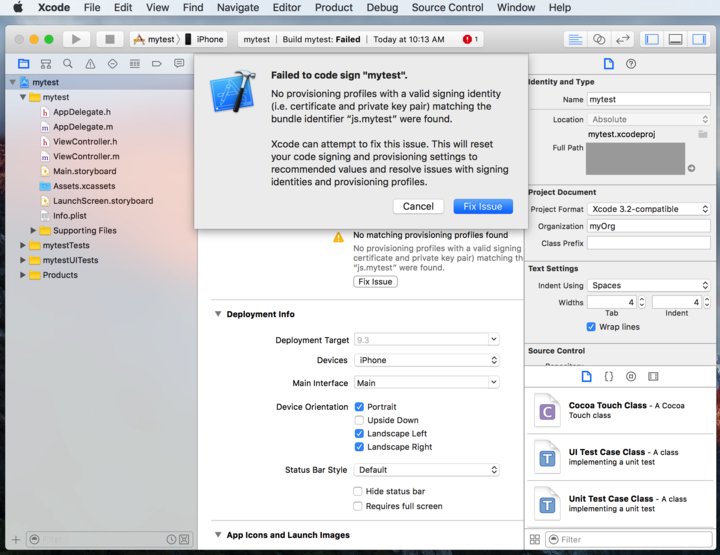
After this your build should succeed and your blank Xcode app will install and run on your iOS device.
Use your provisioning profile to deploy with Titanium
We now have our provisioning profile and can close Xcode. In the terminal navigate to your titanium app and run the following command.
titanium info -t ios
You should see your connected iOS device, your development certificate and your newly created provisioning profile. Use the following command along with your device UDID, development certificate and provisioning profile UDID to deploy your titanium app to your device
titanium build -p ios -T device -C “your device UDID here” -V “your development certificate here” -P “your provisioning profile UDID here”
Titanium Command Line Interface Reference
Your app should successfully install on your device. When opening your app for the first time you will need to go to Settings > General > Device Management and ‘trust’ your developer account.
The provisioning profile created with this method will only last for one week. Once your provisioning profile expires you can simply return to your matching project in Xcode and run the project on your device again. Xcode will once again create a new provisioning profile via the “Fix Issue” prompt.