This post is a follow up to my previous Setup Android Lollipop Emulator on OS X post which covered the basics of setting up an Android emulator on your machine. Today, let’s take a look at setting up an iOS simulator on OS X.
Download and Install Xcode
Currently, Apple doesn’t provide a stand-alone simulator app. What you’ll need to do is download Xcode (which is free on the Mac App store). Xcode is a fairly large package and, depending on your internet connection speed, could take anywhere from 10-30 minutes to download. However, once the installation is complete it’ll take less than 5 minutes to have a full iOS experience loaded onto your computer.

Running the iOS simulator
Because the simulator is connected to Xcode it does take a couple steps to load the environment. However, I’ll show you two of my favorite ways to quickly start the simulator.
Quick option #1
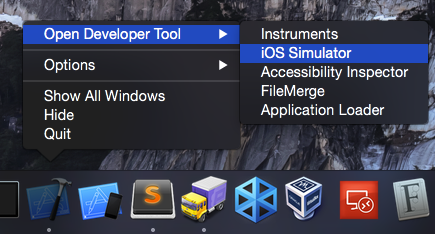
- Open Xcode (this is required)
- Right click the Xcode icon in your dock
- Select the “Open Developer Tool > iOS Simulator” option
Quick option #2 (preferred)
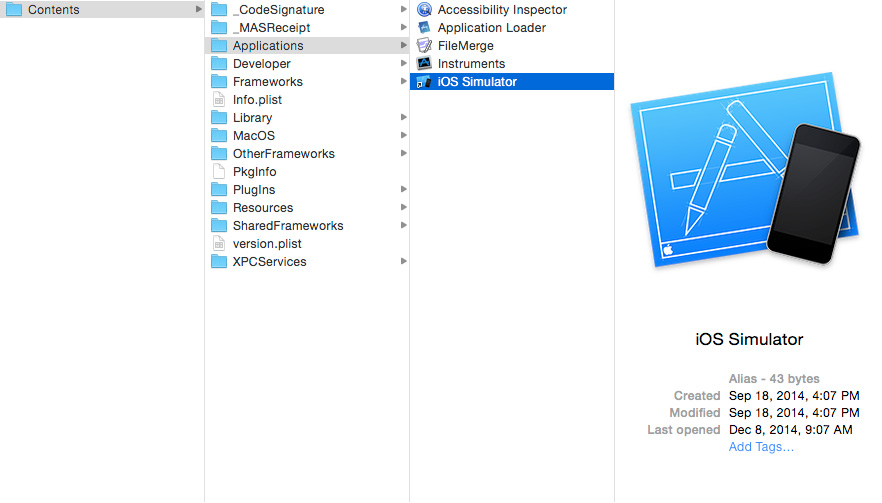
- Right-click the Xcode Application in your Applications folder
- Choose “Show Package Contents”
- Navigate to /Contents/Developer/Applications/iOS Simulator.app
- Drag the iOS Simulator.app into your dock
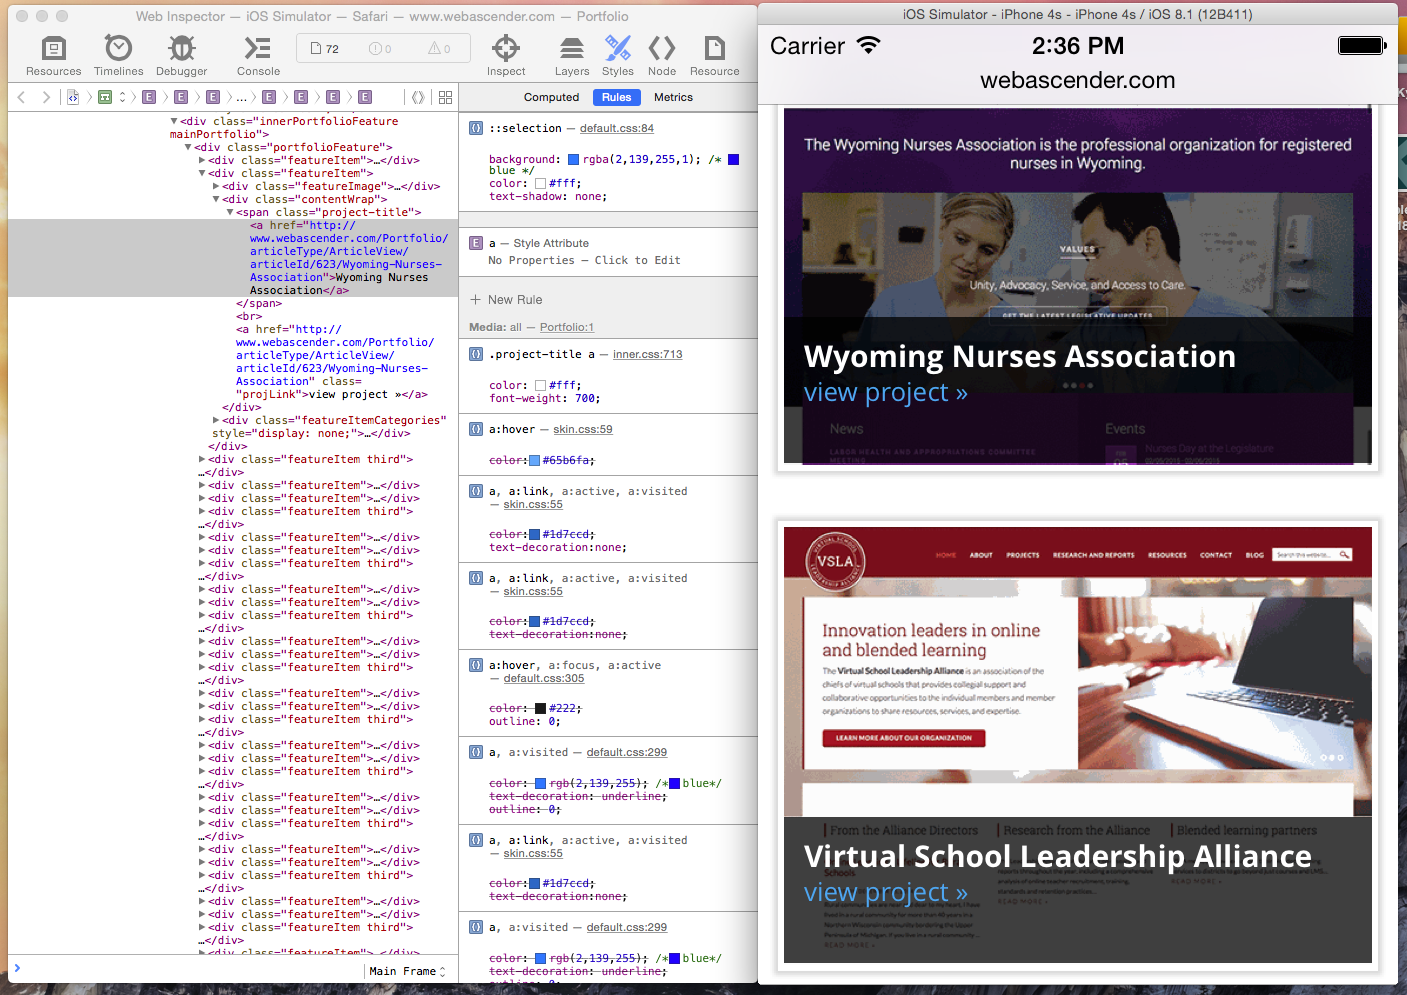
Testing in the iOS Simulator Using Web Inspector
However you choose to start the simulator, open up the Safari app and browse to your site. You should be able to interact with it just like a real iPhone. While tapping, scrolling, and virtual pinching can be cool, let’s get some real work done.

- Open the Mac version of Safari and select Preferences
- Click the Advance tab
- Check the “Show Develop menu in menu bar” checkbox – This will enable the Web Inspector tools

- Click the Develop menu and hover over “iOS Simulator.” A drop-down should appear with the website you’re currently viewing.
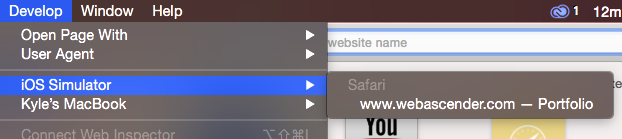
- Once you have clicked on this site a new Web Inspector popup will appear. This inspector is tied directly to your simulated iPhone. From here, you can adjust your HTML, CSS, test for JavaScript errors, inspect elements, run the console, view timeline loads, etc.
Simulating Different Devices
Because of the varying shapes and sizes of each iOS device, it’s a good idea to test your site in multiple simulated environments.
From the iOS simulator, select the Hardware menu and choose Device. From here you can quickly choose between the different versions of iPhones and iPads available. Remember that Retina displays (in most cases) take up more real estate than your screen supports.
Simulating iOS 7.1
Because user adoption rates for new versions of iOS are quite high, you won’t usually need to test your site on versions older than iOS 8. However, if you do, OS X Yosemite supports simulating iOS 7.1 (versions older than 7.1 will need to be installed on a machine running Mavericks or earlier).
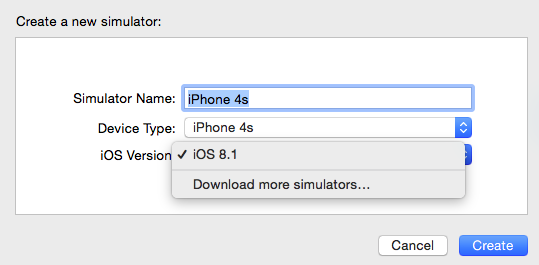
To make the change
- From the simulator, select Hardware > Devices > Manage Devices
- Click the + button to create a new simulator
- Click the iOS version drop-down and choose “Download more simulators”
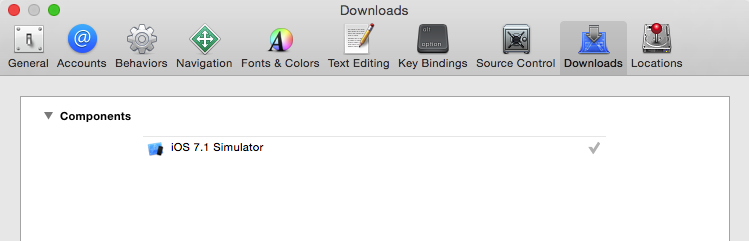
- Under the Components section you should see the option to download the iOS 7.1 simulator. Once completed iOS 7 devices will now appear under the Hardware > Devices menu.
Happy testing!